


Mastering the Throne: Ultimate Tips & Guides for "The King is Watching"
The King is Watching has redefined the roguelike strategy genre by introducing a mechanic that mirrors the pressures of real-world leadership: focus. As a King, your subjects only work at peak efficiency when you are looking at them. This creates a high-stakes environment where resource management, base building, and tactical combat collide in a race against time. The game is not just about having the strongest army; it is about knowing where to direct your gaze to ensure that army is funded, trained, and positioned correctly before the next horde arrives.

In this comprehensive guide, we will explore the intricate layers of "The King is Watching," from the fundamental "Gaze" mechanic to late-game survival strategies. Whether you are a new ruler struggling with the first ten waves or a veteran seeking to optimize your build for a high-score run, these insights will provide the edge you need. We will break down building layouts, unit synergies, and the hidden math behind the game's economy to ensure your reign is long and prosperous. Success in this realm requires a balance of cold calculation and frantic micro-management.
1. Mastering the King's Gaze: The Core of Efficiency
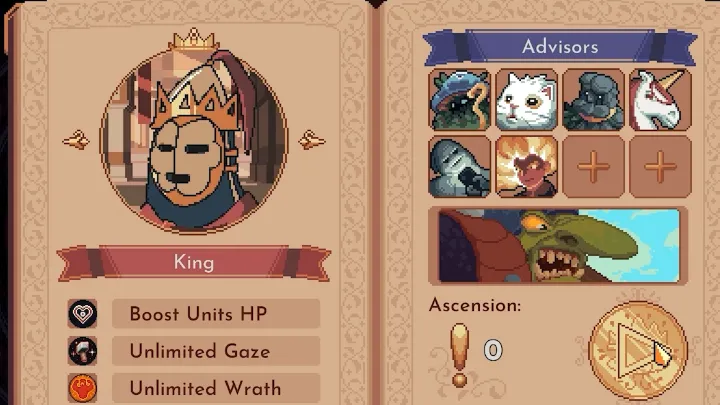
The "Gaze" is the heartbeat of the game. Unlike traditional strategy games where units produce resources at a fixed rate, here, productivity is a variable tied directly to your cursor's position. When your gaze is fixed on a building, it receives a massive speed multiplier—often up to 500%. This means that an unattended gold mine is effectively useless compared to one under the King's watchful eye. Mastering the rhythm of your gaze is the most important skill you will develop.
To maximize this, you must avoid "tunnel vision." Many players make the mistake of staring at a single production building for too long. Instead, adopt a "pulsing" focus strategy. Rotate your gaze every few seconds between your primary gold source, your lumber yard, and your active barracks. This ensures that all production lines stay moving. Think of yourself as a conductor of an orchestra; you don't just look at the violins, you move your attention to whichever section needs the tempo boosted at that exact moment.
Focus Multiplier Breakdown
- Direct Focus: 100% efficiency (4x–5x base speed).
- Peripheral Focus: 25%–50% efficiency (depending on upgrades).
- Unattended: 5%–10% base speed (virtually stagnant).
2. Early Game Economics: The First Five Waves
The first five waves are the "Foundational Phase." During this time, the enemies are weak, but your resources are even weaker. Your primary goal is not to build a massive army, but to establish a "Greed Engine." You should invest almost every gold coin into Gold Mines and Lumber Yards. Use the bare minimum number of archers to hold the line. If you can survive Wave 5 with three upgraded mines, you have set yourself up for a much easier mid-game.
During these early waves, time is your most valuable resource. Use the King's gaze almost exclusively on gold production. Only flick your eyes to the barracks when you have the exact amount of gold needed to queue a unit. If you find yourself with excess gold and no units to build, you have failed to balance your production. The goal is to always be "broke" because every coin you own should be working for you in the form of a building or a soldier.
Initial Build Priority
- Gold Mine: Your primary source of income.
- Lumber Yard: Essential for towers and walls.
- Barracks: To produce the meat-shield spearmen.
- Archer Tower: For consistent, low-cost damage.
3. Strategic Kingdom Layout: The Compact Strategy
Because your gaze has a limited area of effect, the physical layout of your kingdom is a strategic choice. Spreading your buildings out across the map is a recipe for disaster. You want to cluster your most important buildings—Gold Mines, Lumber Yards, and Barracks—as close together as possible. This "Compact Layout" allows your gaze to hit multiple buildings at once, effectively doubling or tripling your productivity without any extra effort.
However, a compact base comes with risks. If an enemy breaches your walls, they are immediately in range of your entire infrastructure. To counter this, use a "Cellular" approach. Group your economy in the center and surround it with production buildings that act as secondary barriers. Position your Blacksmith and Research centers in the corners where they don't need constant focus, as their upgrades are often one-time investments rather than continuous production cycles.
4. Unit Synergy: Building a Balanced Army
A common pitfall is the "Mass-Unit" trap, where a player builds 50 of the same unit type. In The King is Watching, units have specific roles that must be harmonized. Your frontline (Spearmen and Knights) exists only to buy time. Your backline (Archers and Mages) exists to deal damage. Without a frontline, your archers die instantly; without a backline, your knights eventually crumble under the weight of the enemy's numbers.
The "Anvil and Hammer" Composition
- The Anvil: 5–10 Knights or Spearmen. Their job is to hold the chokepoint.
- The Hammer: 15+ Archers or Crossbowmen. They provide the DPS (Damage Per Second).
- The Catalyst: 2–3 Mages. They provide area-of-effect (AOE) damage or crowd control.
Advanced Unit Roles
- Shieldbearers: High defense, low speed. Perfect for boss stalls.
- Snipers: Long range, high single-target damage. Use these for enemy casters.
- Pyromancers: High AOE. Essential for "Swarm Waves" (large groups of low-HP enemies).
5. Mid-Game Scaling: The Blacksmith Pivot
Around Wave 15, you will notice that simply building more units isn't enough. The enemies' health pools start to outpace your raw DPS. This is when the Blacksmith becomes your most important building. Upgrading your units' base stats is a "force multiplier." A +1 attack upgrade on 20 archers is effectively the same as adding 5 new archers to the field, but without the cost of food or space.
Priority should be given to "Attack Speed" and "Range" for ranged units, and "Armor" for melee units. If your melee units are dying too fast, don't just build more; upgrade their health. If the enemy is reaching your walls, upgrade the range of your archers so they can start firing sooner. The Blacksmith allows you to scale your power exponentially while keeping your unit count manageable for your focus capacity.
6. Defensive Layering: Beyond the First Wall
A single wall is a thin line between life and death. As the game progresses, you must implement "Layered Defense." This means having an outer wall to catch the initial wave, a "Kill Zone" filled with traps or focused fire, and an inner wall to protect the King. If the outer wall falls, you shouldn't panic; you should have a secondary line of units ready to engage while the King's gaze is used to repair the breach.
Towers should be placed in "Crossfire" positions. Do not put all your towers in one spot. If you place them on opposite sides of a path, the enemy is constantly under fire even as they move forward. Use "Slow Traps" or "Tar Pits" in front of your walls to keep enemies in the archers' firing range for as long as possible. The goal of defense isn't just to block the enemy; it's to maximize the time they spend in the danger zone.

7. Managing the King's Mana and Active Skills
The King is not just a passive observer; you have active skills that can turn the tide of a losing battle. These skills require Mana, which regenerates slowly. Using a skill like "Sovereign Shout" (which boosts unit speed) at the start of a wave is usually a waste. You should save your Mana for the "climax" of the wave—the moment when the most dangerous enemies are bunched up or when your wall is at 10% health.
Skill Usage Priority
- AOE Damage: Use when 10+ enemies are stacked.
- Repair/Heal: Use only when the wall is below 20%.
- Production Boost: Use during "Quiet Waves" to catch up on resources.
Understanding the "Cooldown Economy" is vital. If a skill has a 60-second cooldown, and a wave lasts 45 seconds, you can only use it once per wave. Time your usage so that the skill is available for the next wave's toughest moment.
8. Navigating Special Enemy Waves
The game will occasionally throw "Mutation Waves" at you. These include Flying units, Siege Engines, or Stealth Assassins. You cannot use the same strategy for every wave. Flying units ignore your walls and melee units, meaning if you don't have enough archers or anti-air towers, you lose instantly. Stealth units require "Detection" buildings or specific King upgrades to see them before they reach the throne.
When the game warns you of an incoming special wave, shift your production immediately. If it's a "Heavy" wave (high armor), stop producing archers and start producing mages or units with armor penetration. Being flexible is more important than being powerful. A king who cannot adapt to a new threat is a king who will soon be deposed.
9. Boss Strategy: The Decennial Test
Every 10 waves, the "Gatekeeper" bosses appear. These are the true gear-checks of the game. Bosses often have mechanics that disable the King's gaze or summon smaller minions to distract your towers. To beat a boss, you must focus on "Focus Fire." Manually direct your units (if the upgrade is unlocked) or use the King's gaze to prioritize the boss over the smaller minions.
During a boss fight, your economy is secondary. Move all your focus to the frontline. Use your Mana skills aggressively. If the boss has a "Charge" attack, be prepared to replace your frontline units the second they fall. A boss fight is a war of attrition; as long as you can produce units faster than the boss can kill them, you will eventually win.
10. Late-Game Optimization: The Endless Cycle
In the late game (Wave 50+), the game becomes a cycle of "Perfect Execution." One missed gaze rotation can lead to a breach. At this stage, you should have "Passive Income" upgrades that allow your mines to work at 20–30% speed even when you aren't looking. This frees up your gaze to stay almost permanently on the military and the walls.
Maximize your research tree. By now, you should have unlocked the final tier of units like Paladins or Archmagi. These units are incredibly expensive but provide the necessary stats to survive the massive HP scaling of late-game enemies. Keep your layout clean; delete any early-game buildings that are clogging up space or distracting your peripheral focus.
Conclusion:
Ultimately, "The King is Watching" is a game about the weight of responsibility. It punishes hesitation and rewards decisive action. By mastering the rhythm of your gaze, building a compact and synergetic kingdom, and knowing when to invest in technology over raw numbers, you can ascend to the top of the leaderboards. Every failure is a lesson in timing, and every victory is a testament to your focus.
The path to a legendary high score is paved with calculated risks. Don't be afraid to let a wall fall if it means finishing a crucial upgrade at the Blacksmith. Don't be afraid to spend your last coin on a mage that might freeze the horde just in time. Stay vigilant, keep your eyes on the horizon, and remember: the kingdom only survives as long as the King is watching.
Master the King's gaze to boost production, build compact layouts for efficiency, and balance unit types to survive waves and defeat bosses in this strategy game.